MAST USER GUIDE
The Mitigation Action Strategy Tool (MAST) enables project stakeholders to explore, edit, and track mitigation strategies throughout the HMP lifecycle. MAST facilitates collaboration and efficiency by providing stakeholder groups with a centralized, straightforward user interface to make edits, track progress and prioritize next steps. Beyond just improving workflow efficiency, this application was designed with regulatory compliance in mind — translating to successful grant applications down the line. Spend less time trying to track down information, and more time delivering high-impact mitigation projects to your community.
The primary functions of the MAST application are:
- Create, edit and view mitigation actions for all participating jurisdictions in a given HMP, along with information relevant to each action item
- Assign priorities track status throughout the project life cycle
- Relate individual mitigation actions to identified problem statements (per FEMA requirement)
- Access real-time data visualizations and summaries to support project management and decision making
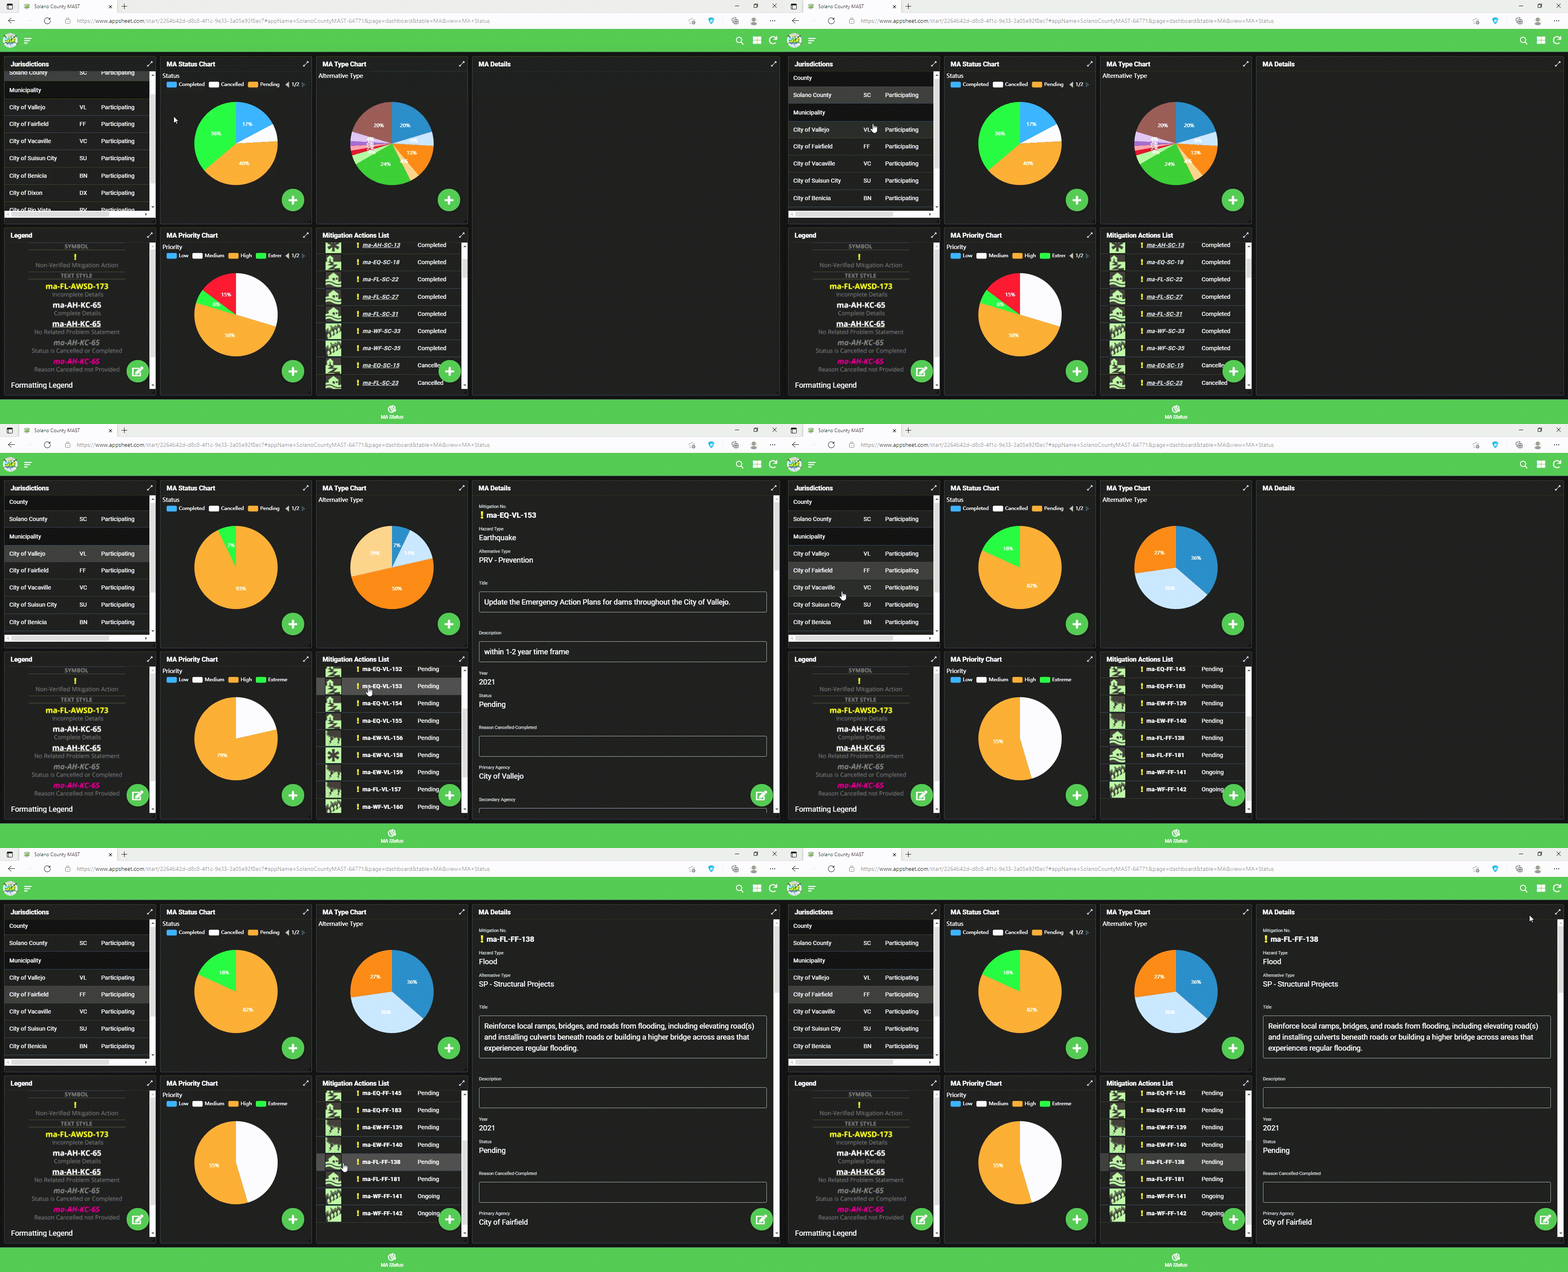
The basic anatomy of the MAST application consists of multiple “views”, or dashboards, which display windows containing different information and editing capabilities. The menu in the upper-left hand corner of the screen allows the user to toggle between multiple view options.
MA Status Dashboard
Upon launching MAST, the default view is the MA Status dashboard, which displays the broadest summary of all mitigation actions across jurisdictions. Descriptions of individual windows within the MA Status dashboard are listed below.

MA Status Page
Jurisdiction Tracking
For multi-jurisdictional HMP’s, this window provides a count of mitigation actions per jurisdiction. Click on the name of a jurisdiction to view / edit a subset of mitigation actions specific to that jurisdiction.
Status Indicators
Pie charts provide summaries of the status (i.e., in progress/completed/cancelled), activity type (i.e. public education/property protection), and priority (i.e. low/medium/high) of a selected list of mitigation actions. Pie charts are responsive, reflecting the list of MA’s assigned to the user’s selected jurisdiction on the leftmost window. Pie charts are also interactive — select a portion of the pie chart to view/edit a list of mitigation actions which satisfy the selected condition(s).
MA Listing/Detail
The MA Listing window displays a list of all mitigation action items, sorted by jurisdiction (also responsive to the jurisdiction selection). Next to each title is symbology depicting the hazard type, and verification status. Select the name of a mitigation action item in the listing window to view and edit its details in the Detail window to the right.
Mitigation No.
Each mitigation action is automatically assigned a unique ID number which reflects the hazard type and jurisdiction. With potentially hundreds of mitigation actions across dozens of participating agencies, assigning logical ID’s is essential to the functionality of MAST.
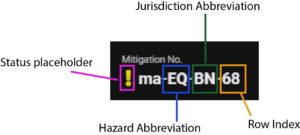
Additionally, to facilitate tracking of progress the font and color of each Mitigation No. reflect various pending actions (key below).
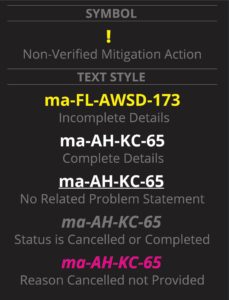
Formatting Rules
Use the green plus icon at the bottom right corner of the any MA window to create or edit mitigation actions.

add new

edit
The subsequent entry form is designed to ensure high quality data entry and store information relevant to FEMA HMP approval as well as down-the-line grant applications.
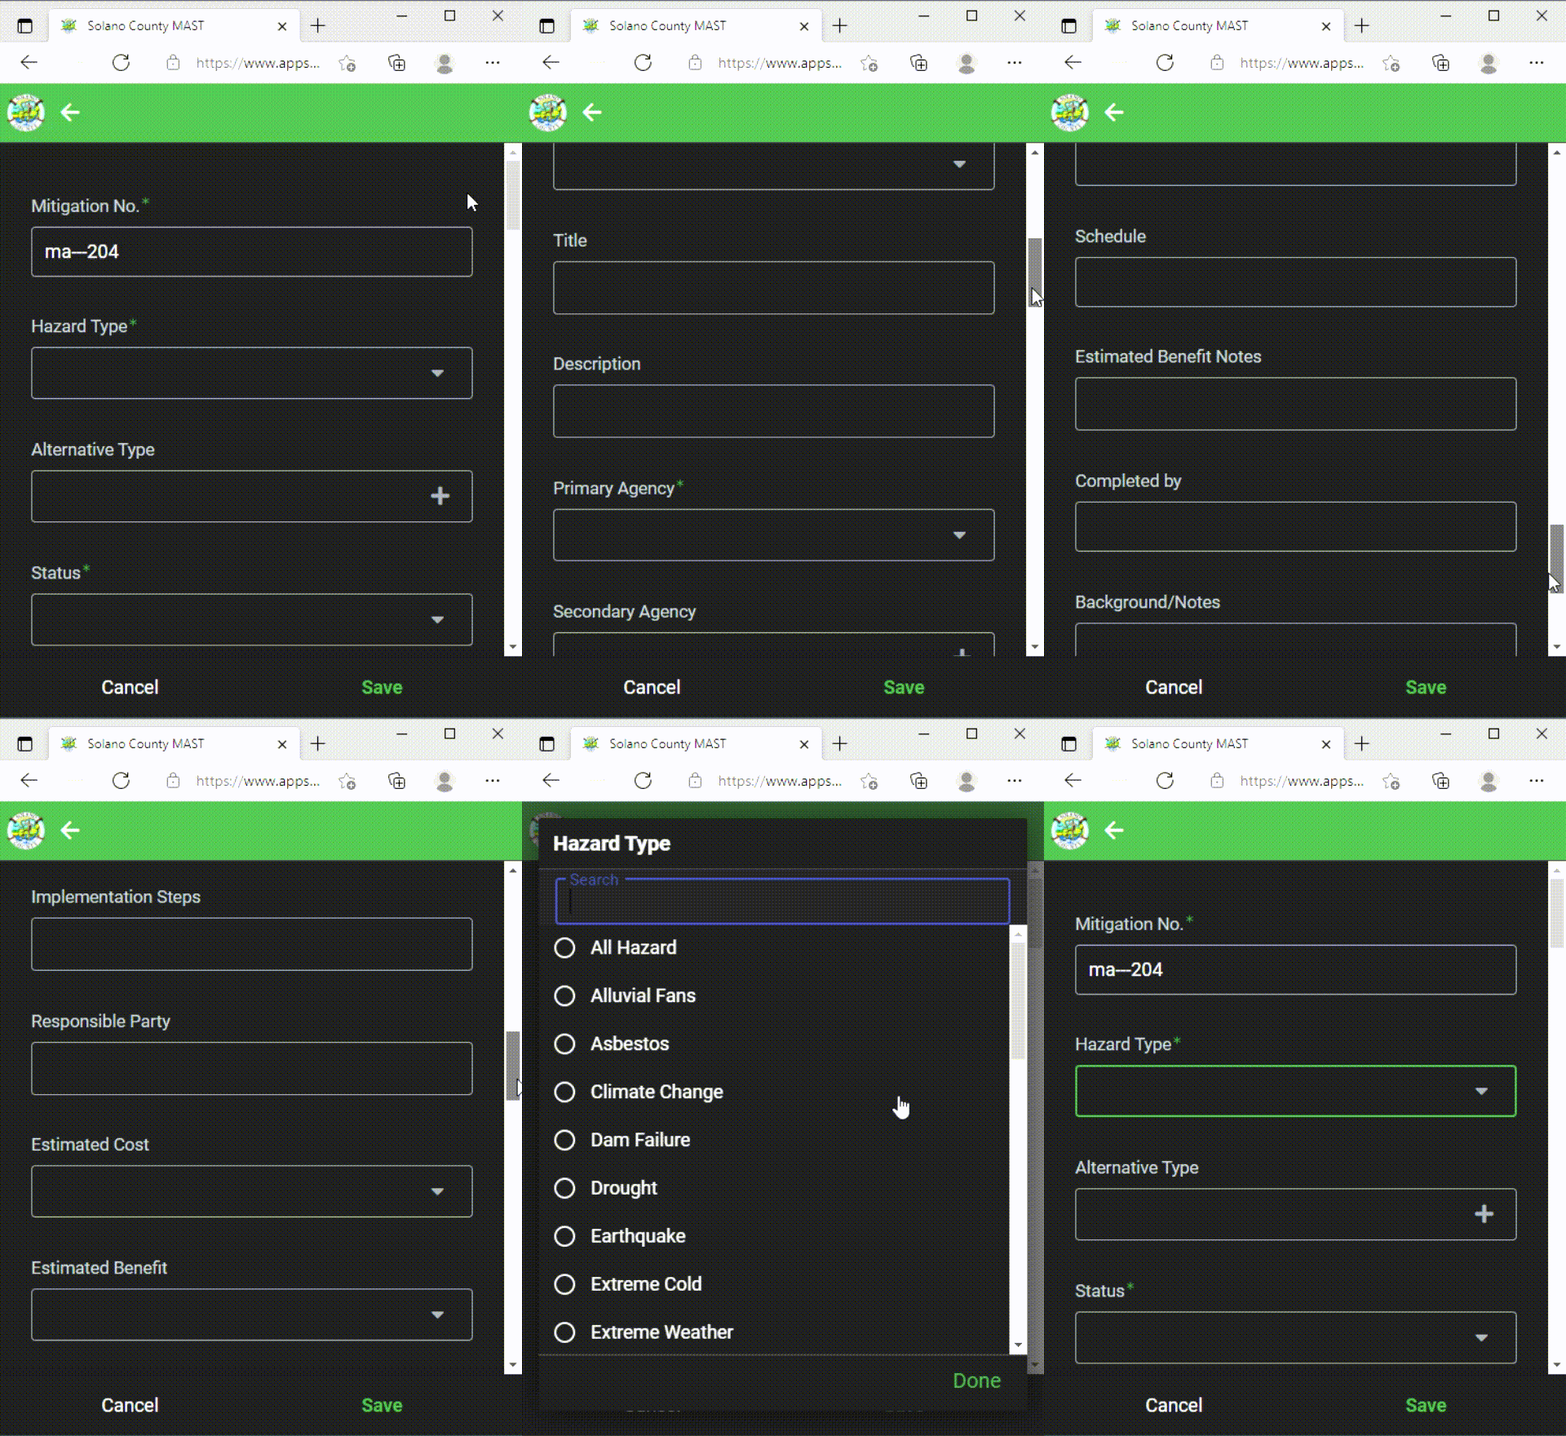
MA Data Entry Form
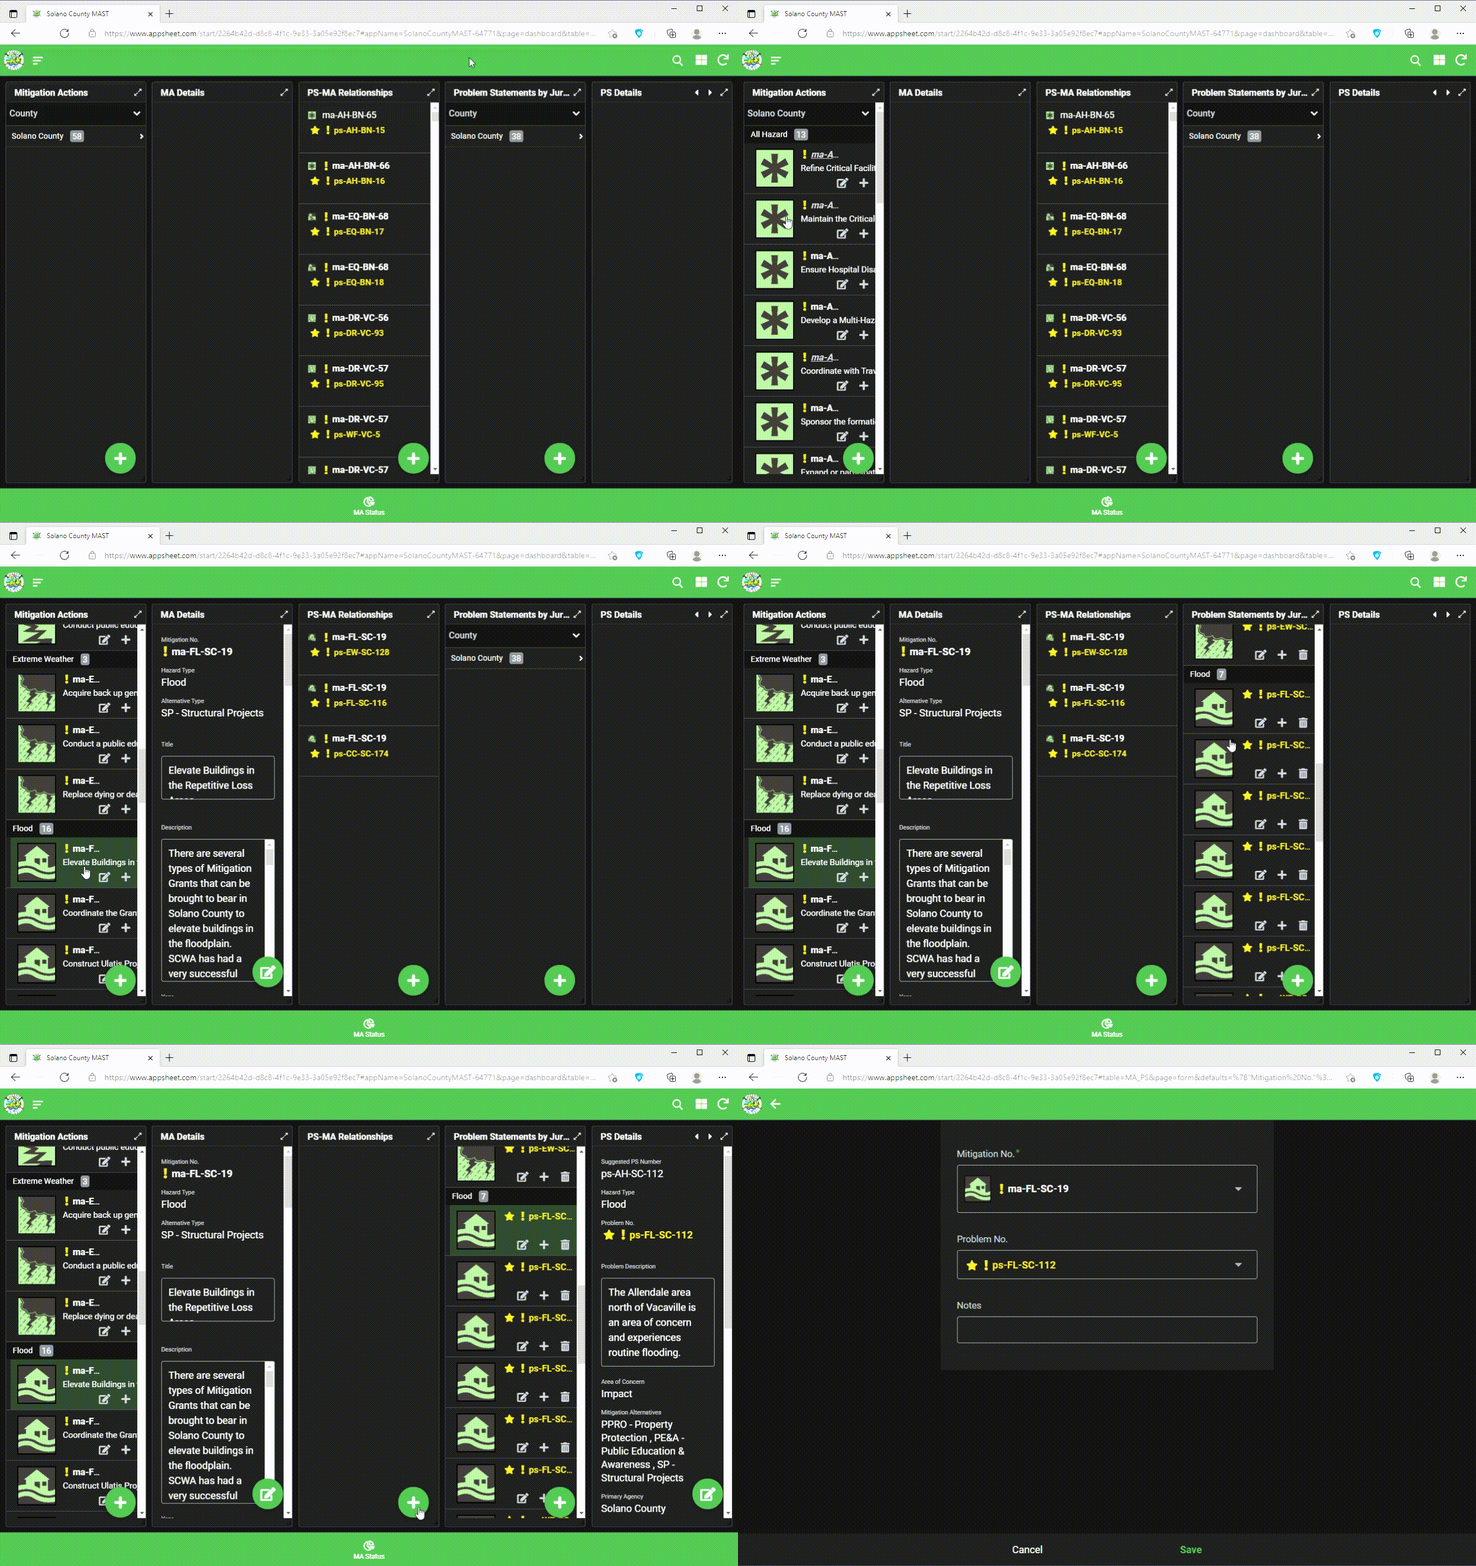
“Problem statements” describe the effects of a hazard occurrence on the community and its assets. Within the context of the HMP process, this ensures that each jurisdiction’s identified mitigation actions are tailored to the specific problems created by locally profiled hazard scenarios. The MA Builder tool can be used to create linkages between one or multiple mitigation actions and problem statements. Access this dashboard by selecting from the main menu in the upper left-hand corner of the screen.
The MA Builder Dashboard is oriented with Mitigation Actions to the left-hand side of the screen, and Problem Statements to the right. To create a new PS-MA relationship, select the appropriate Mitigation Action and Problem Statement such that they appear in the detail viewer windows. Click the “add” icon in the middle PS-MA window, and the next menu will automatically populate the correct details. Save to exit.
Creating a new PS-MA join


